Setup DNSCrypt On macOS
DNSCrypt is a protocol that authenticates communications between a DNS client and a DNS resolver. It prevents DNS spoofing. It uses cryptographic signatures to verify that responses originate from the chosen DNS resolver and haven’t been tampered with.
dnscrypt-proxy 是 DNSCrypt 在 macOS 上一个实现,使用 DNSCrypt 能有效防止 DNS 污染。安装配置非常简单,仅有两步:
- 安装 Homebrew(macOS 的安装包管理)
- 安装&配置 dnscrypt-proxy
安装 Homebrew
注意:如果已经安装过 Homebrew,请跳过此部分 通过运行
brew doctor检查一下是否一切正常。
Homebrew 是 macOS 下必备的包管理解决方案,类似 Ubuntu 下的 apt-get。
Homebrew 需要 Xcode Command Line Tools 或 Xcode,如果你不是 iOS 或 macOS 的开发者就没有比较安装庞大的 Xcode,用 Xcode Command Line Tools 就够了。
安装 Xcode Command Line Tools
安装 Xcode Command Line Tools,在命令行中执行,按照提示下载安装:
$ xcode-select --install
安装 Homebrew
安装 Homebrew,在命令行中执行:
$ /usr/bin/ruby -e "$(curl -fsSL https://raw.githubusercontent.com/Homebrew/install/master/install)"
检查 homebrew 是否安装就绪,在命令行中执行:
$ brew doctor
Your system is ready to brew.
如果提示出现有问题,请根据提示修复。看到 Your system is ready to brew. 那 Homebrew 就算安装完成了。
安装&配置 dnscrypt-proxy
通过 Homebrew 直接安装 dnscrypt-proxy:
$ brew install dnscrypt-proxy
更新域名解析服务器:
$ sh $(brew --prefix)/opt/dnscrypt-proxy/bin/dnscrypt-update-resolvers
启动 dnscrypt-proxy 服务:
$ sudo brew services start dnscrypt-proxy
验证 dnscrypt-proxy 已经正确启动,我们可以使用 dig 命令向本机发起 DNS 查询,有结果返回证明服务已经启动:
$ dig @127.0.0.1 www.google.com

; <<>> DiG 9.8.3-P1 <<>> @127.0.0.1 www.google.com
; (1 server found)
;; global options: +cmd
;; Got answer:
;; ->>HEADER<<- opcode: QUERY, status: NOERROR, id: 50044
;; flags: qr rd ra; QUERY: 1, ANSWER: 1, AUTHORITY: 0, ADDITIONAL: 1

;; OPT PSEUDOSECTION:
; EDNS: version: 0, flags:; udp: 4096
;; QUESTION SECTION:
;www.google.com.			IN	A

;; ANSWER SECTION:
www.google.com.		233	IN	A	172.217.20.196

;; Query time: 425 msec
;; SERVER: 127.0.0.1#53(127.0.0.1)
;; WHEN: Mon Apr 17 18:54:38 2017
;; MSG SIZE  rcvd: 59
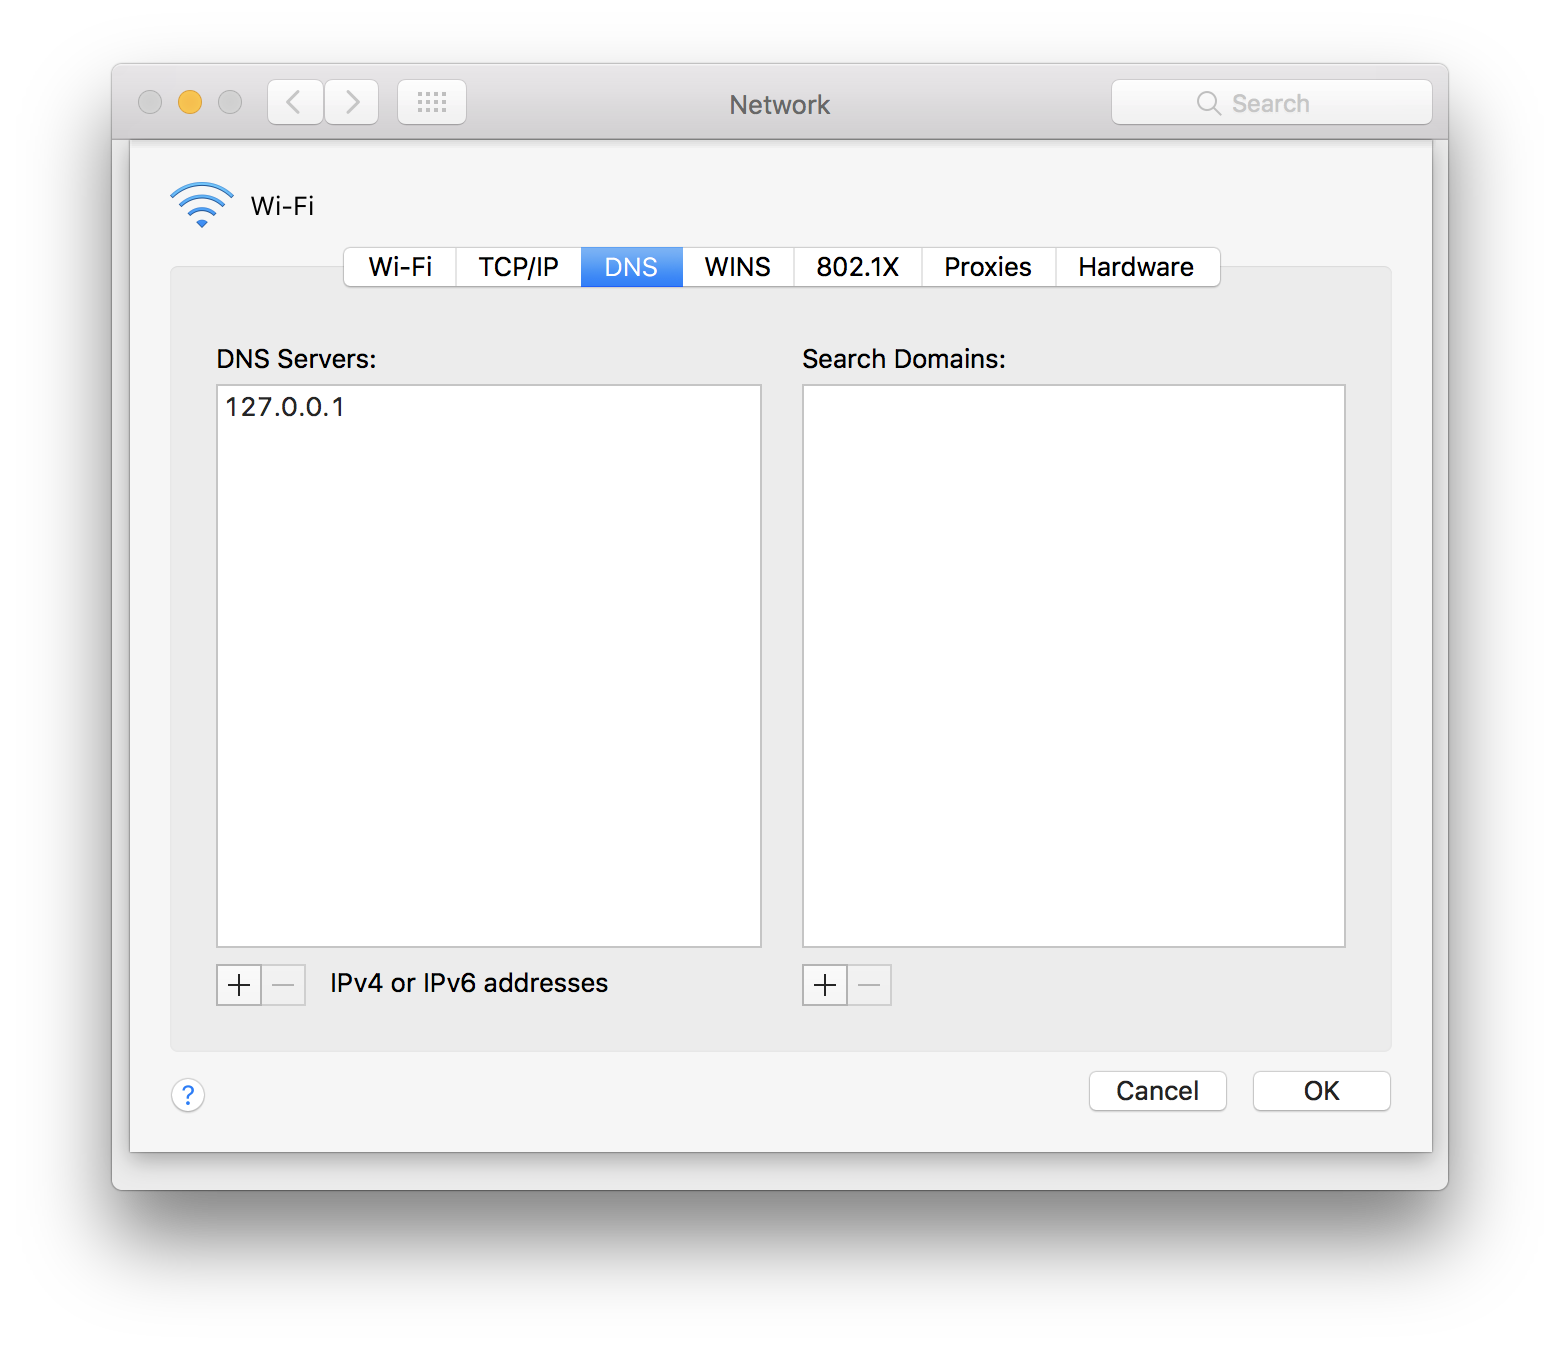
最后一步,就是在系统网络设置中,配置 DNS 服务器为 127.0.0.1:
打开 系统偏好 -> 网络 -> 高级 -> DNS ,添加 127.0.0.1 作为网络的 DNS 服务器。
(搞定)